29 December 2011

Badminton

Well, all those plans for a week off work and I don't think I've done anything - but I am fairly well rested which was much needed.

Hope everyone has had a good Christmas break too.

This card was made for a friend who, you can probably guess, I play badminton with. His birthday was Christmas Day and we have played today to try and run off a few mince pies.

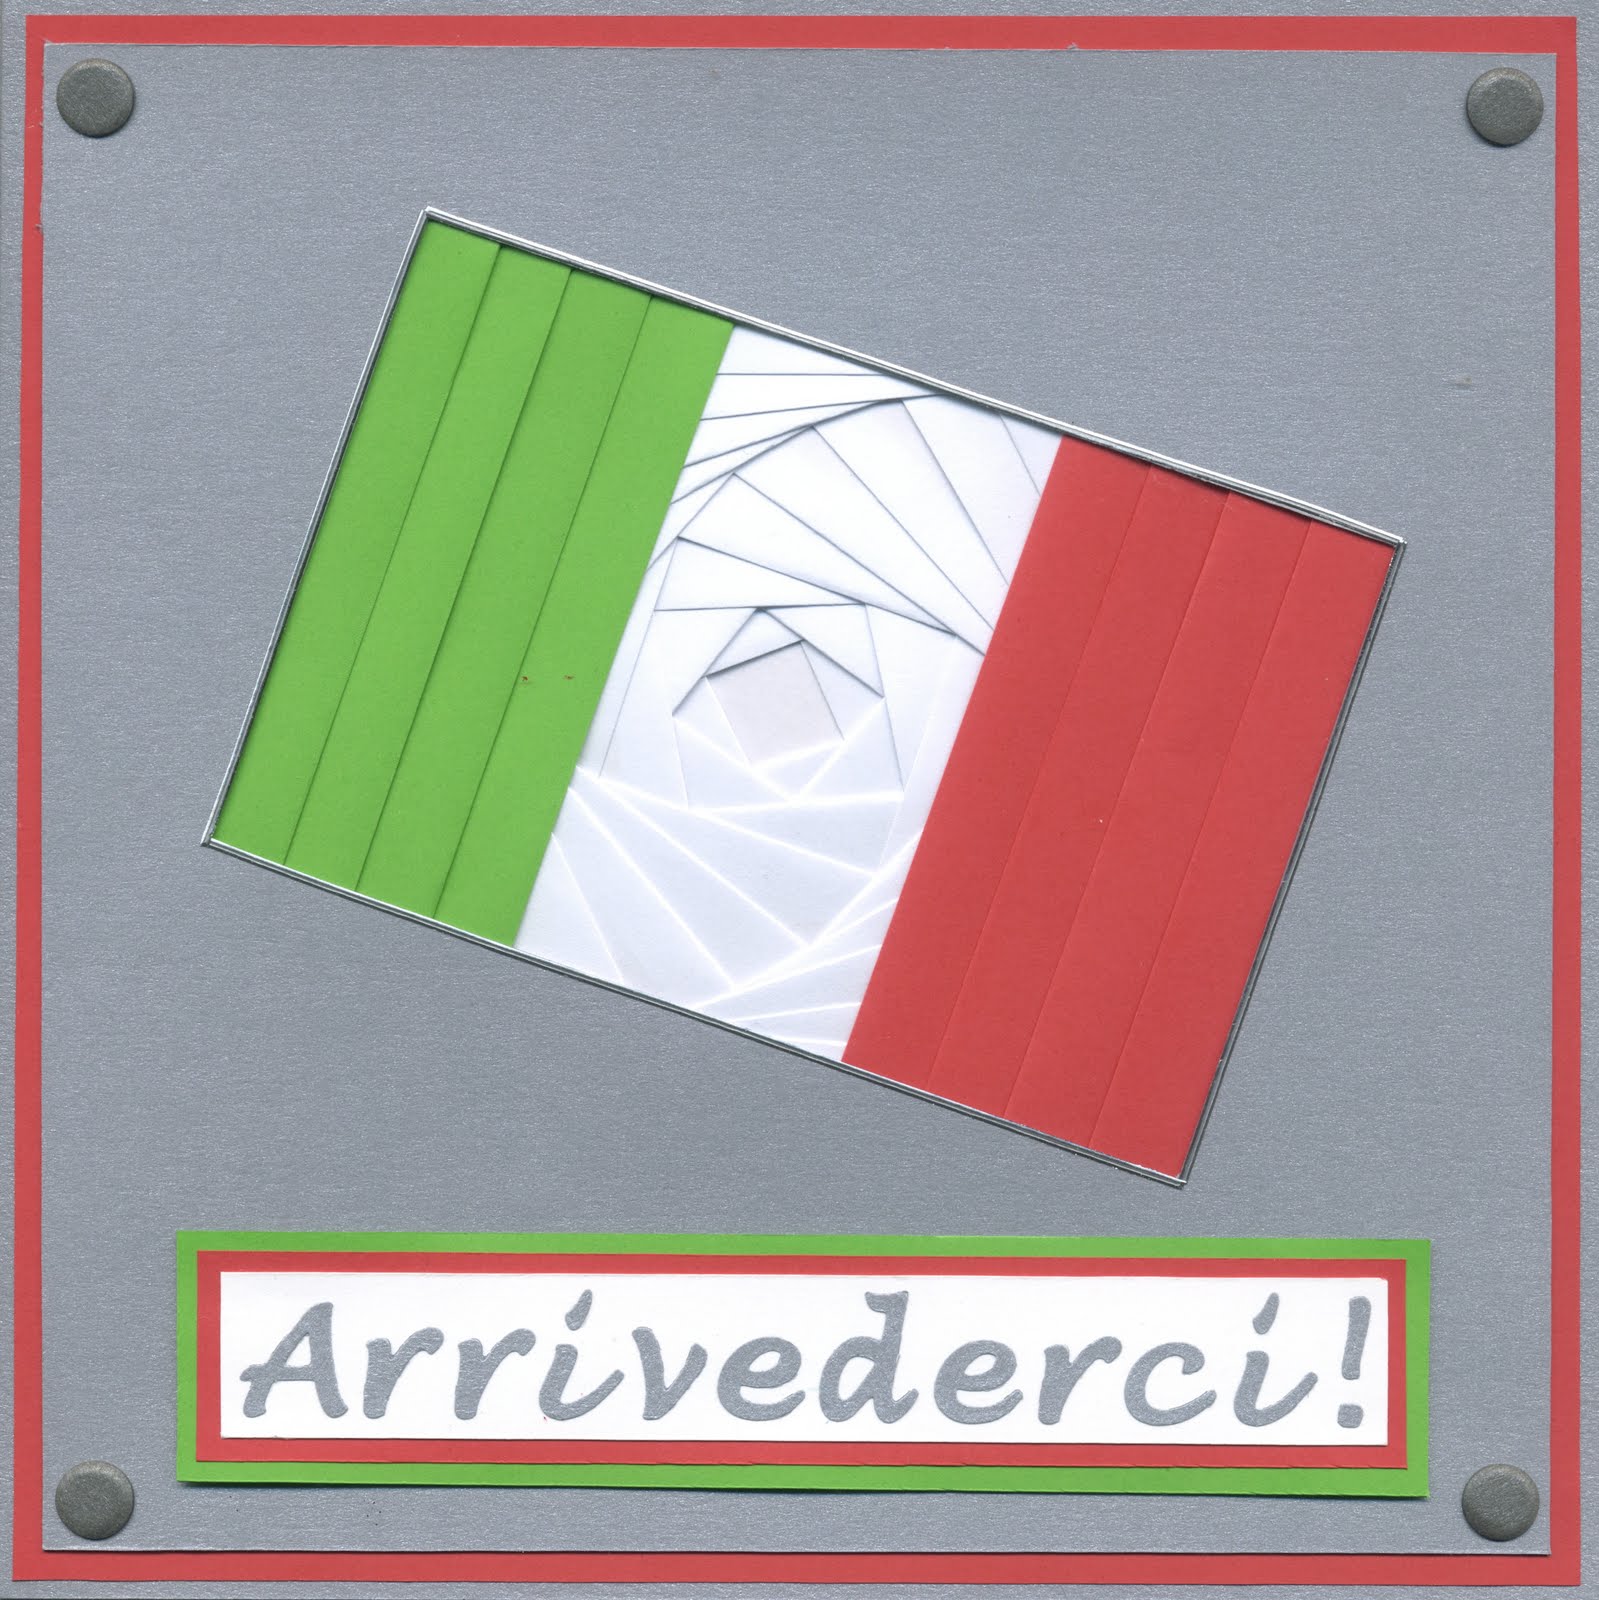
The image I think was off CraftsUPrint and is a pyramage design. I have just layered it up and mounted it on a couple of contrasting layers, doing the same with the sentiment and finishing off with matching card candy.

Now to play with some Penny Blacks that seem to have turned up in the last few days!

24 December 2011

Merry Christmas

Wishing all the bloggers out there a lovely Christmas and a crafty New Year.

Since I last posted has been very hectic and the few cards I have made have been duplicates of ones previously posted. Thought I'd end for Christmas with a little quilled card. Just a simple snowflake using white and silver paper, layered on matching paper cut out using Xcut dies and mounted on a card from Cutting Edge with a pre-embossed message.

I very much need a rest for a few days now but look forward to trying out more crafty ideas very soon.

Have a good holiday everyone and thanks for checking up and commenting on my posts through the year.
Jill

13 December 2011

Rudolf

Last post for a few days as there are a few too many festive events going on!

This card is made from a new Hobby Art stamp set.
It has been designed like their build-a-scene sets where you can create a picture just using one set.

I stamped Rudolf and the log, then added the Robin and some background snow lines and trees in the distance.
The great fir branches at the top of the card are also in the set.

I must add this is not my idea but one shown to me by Jenny Mayes when I saw her a few weeks ago.

I tried colouring with aquamarkers which needs a little practice and versamarked snowflakes and chalked over them for the sky.

Finished with a touch of glitter, some 'fluffy stuff' for snow and a stamped sentiment.

11 December 2011

Delivery

As mentioned, these are the cards I made for someone for the weekend.

There are 5 of the Molly Bloom shepherds I have previously posted, including one done in more girly colours.

There are 6 of the group of reindeers (run out of little red fluffy noses now though if anyone has any top tips for next year - have resorted to colouring white ones with copics for now!).

There are 3 bauble cards which are an 'up-size' of the card I also posted recently and in shades of blue.

Plus a couple of special commissions which I have hidden away for now!

10 December 2011

Gingerbread man

This little chap accidentally came my way in a sale opportunity a few weeks ago - isn't he nice?

He is a Penny Black slapstick stamp. I embossed him on brown card and added some white highlights and a touch of holly berry & leaf colour.

Simply mounted on to a punched scallop circle and then on to a lovely shaped card from Craftwork Cards which I embossed a few snowflakes on to.

Sentiment is from a Hobby Art set.

9 December 2011

Baubles

Phew - just finished an order of 16 cards for someone, will take a pic tomorrow.
This card is a design that Jenny did with us for a make and take last year - another 'simple but effective' number!

A layer of card slightly smaller than the base card is edged and cornered with SU punches.
A little strip of co-ordinating paper added and some of the lovely SU baubles stamped and punched. Sentiment added from a Kanban set.

I had plans of mass-producing this year - maybe for 2012!!

7 December 2011

Penguin

Another quick card today - been busy fulfilling an order!
This little chap is something I've been wanting to try - maybe needs a little fine tuning but quite fun.

He is made using the SU owl punch. The 'ears' are trimmed off and feet added in a different colour to turn it in to a penguin. He's then just layered on a couple of punched shapes and the sentiment is stamped and embossed using some 'tangerine tango' powder I won recently at Jenny's day and the whole thing finished with a touch of card candy.

5 December 2011

Pines & Poinsettias

Today's card is using the Pines & Poinsettias stamp set we got as a 'keep' after our recent Stampin' Up day with Jenny.

Not a set I would of looked at twice in the catalogue (not helped by the image not really doing it justice) but I'm quite a fan now we've had a play.

I stole this idea from somewhere on the internet, a nice simple & effective card.

The base card has the little holly leaf stamped on it in versamark ink. A green strip of card has then been edged with the scallop trim border SU punch and a strip of co-ordinating paper added (from the stash).

I used coloured pens on the pine cone stamp and punched out, layering it on a scalloped punch shape and a peel off added to the SU modern label punch and hey presto!

4 December 2011

Quilled Wreath

Today's merry offering includes some very uncomplicated quilling!

The base of this design is a Woodware clear stamp which as soon as I saw it I pictured filling the circles with quilling.

The different sized circles are filled with different sized loose and closed coils in a variety of 2mm & 3mm green and red paper. I left a few spots to which I added some green stickles to break it up a little.

I cut the wreath out with a circle punch and mounted it on a larger circle, then a couple of squares - with extra quilled coils added to the cut out circles.

Greeting is a stamped Penny Black one and the corners were finished off with co-ordinating photo corners from my SU punch.

3 December 2011

Penguins

Today's Christmas offering are some lovely Penguins from a 'Little Musings' clear stamp set.

I've just stamped and embossed the image and coloured with bright copics. I've then added some white flower soft 'snow' for them to stand in.

The picture is mounted on card which I've cut the punched the corners with my lovely swiss cheese EK Success punches, some of the dots are re-used in the corners.
The stamped greeting has been punched out with the SU Label punch and a couple more layered behind for a nice finishing effect.

1 December 2011

Mini Calendar

Hooray - Mr Blogger blip over with and here is the project I was trying to post.

Found myself at a little Stampin' Up evening early this week and the 'make and take' was this lovely little calendar.

We were given free rein with it but I didn't want to go too flash and like the simplicity of these two stamped flowers from the Vintage Vogue set, cut out and stuck over the stamped leaves.

Another stamp from the set has been used to add a border at the bottom of the card - the lovely matching ink and card do make this project.

The project does stand up but I have scanned it flat to post today. Back tomorrow!

30 November 2011

Party Calendar

Mr Blogger is having a funny 5 minutes so I will sort out my latest post tomorrow (and some more the following days as I have managed to put some of my pieces together to make whole cards now)!

Sorry Janet - I am trying!
Jill

27 November 2011

Craft Superstore

Right, back to it - stamped a few images this week but couldn't decide how to mount them so have been working on that today.

This card is a 'make & take' from a Craft Superstore party I went to on Friday. This is a new venture for them and it was Kate's first party too.

The Forever Friends bear is from a Docrafts set, not quite the colour I would of chosen for him but after picking the stamp it was the only bear related colour.

He was coloured in papermania pens and cut out using a Marianne die on the big shot. Sentiment is also from the stamp set.

Some Christmas paper was edged with a red ink pad (as was the die) and stuck to the base card. A co-ordinating strip of card was then also added as a nice touch with some ribbon stuck behind it so we could tie a bow. A couple of corners were also added to finish - also using the big shot.

The evening was to showcase Craft Superstore products and get everyone to play with some of the items and have a look at the card available etc. Another very enjoyable craft evening!

20 November 2011

Lego!

Didn't get to play with cards yesterday but I did help make this Lego police station, complete with helicopter, van, motorbike, helipad, jail, fingerprint room and 'mugshot' room!

Today I have done a little experimenting between Italian homework and will post another card when I have decided how to mount them.

17 November 2011

Hickory Dickory

Well, a different evening out tonight - I've just been to see Prunella Scales & Timothy West at the local theatre Literary Cafe performing readings which was somewhat different and rather enjoyable.

I also had not posted this card before as it was made way ahead of time. For various reasons I was asked to make a card with a Hickory Dickory Dock theme.

Handily I found this clock in an Elizabeth Moad book, the doors open to reveal an '8' on the mechanism!

I quilled a little mouse and Ashley's name was added using a triangle punch in the style of cheese for this card!

A picture frame helped finish it off and provides room for a peel off greeting.

There really will be no post tomorrow as it is the first of the 'evenings out' we get at this time of year!

16 November 2011

Molly Blooms

And today - a lovely Molly Blooms stamped image.

I coloured the image with copics and stamped a second sheep so that I could '3D' him. Added some white flower soft, a quilled star and mounted.

Greeting is from Hobby Art, punched out with SU label punch, mounted on gold and placed on a strip of matching card punched with the SU dotty ribbon border.
They have a lot to answer for SU!!

Might have to miss a post tomorrow as off for a cultured evening out, I'll see what I can rustle up for later in the week.
Jill

15 November 2011

Rudolph

Well, I need a new rubber stamp like a hole in the head! I try not to even look at wooden ones too much now as I do love clear stamps but a sample of these reindeer caught my eye at the weekend.

The stamp by Great Impressions made me chuckle so I picked it up to find it was £9.50! As I put it back I noticed a sign saying it was half price - so I had to buy it (didn't I?).

I've stamped him and coloured him with copics, with gold promarker for the bells and a fluffy red nose.

Punched the image out and layered it on to red mirri card. I've coloured a peel off greeting in red to match and cut out with some trusty SU punches, added some red card candy to the corners and all on a Craftwork Cards scallop edge card.

14 November 2011

Bauble Inspiration

Thanks to Jenny for a fabulous Stampin' Up Extravaganza Day on Saturday, a very busy day but so much inspiration.

I had admired the mauve/blue colourway Jenny had used before so very much 'stole' the design we used to decorate our picture frame and made the design in to an 8x8 card (a new stock of which happened to come my way on Sunday after visiting the Sincerely Yours show!).

Using the dotted scallop ribbon border I finally managed to make the very pretty bottom layer - I couldn't master this at the weekend!

The baubles are all from the Delightful Decorations set and used the matching punch which I love. The sentiment is from our new set we came away with at the weekend - 'Pines & Poinsettias'. A set I wouldn't of chosen but am now feeling very inspired to use now.
A little bit of sparkle added with gems and stickles.

I hope you are pleased with me for actually making and posting some cards Janet!

11 November 2011

21st

Just a quick post today with a card required for the weekend.
I have a bit of an aversion to pink things but the recipient of this card does not so it is very suitable!

Not too much to say as the occasion speaks for itself. The '21' is a template from Julie Hickey's 'Quick & Clever Instant Cards'. I cut it out of pink card, layered it on a white base and punched a selection of flowers out of pearly paper.

The middles are then finished with either stickles or gems for a bit of extra sparkle.
Looking forward to Jenny's Christmas Stampin' Up Extravaganza tomorrow!

10 November 2011

New Baby

This is a format I have used a few times this year but usually for Weddings and Anniversaries.

This card was for my Italian Manager who was celebrating the birth of their first baby.
I used a large punch tag and different white and pink card with a selection of embellishments - the bear is a punch that I embossed with sparkly powder, the pram is a button.
The little pink pins ended up in my stash a while ago, then I used stamps, peel offs, a mini foot punch and some baby vellum and added a name (not as traditionally Italian as I expected).

I finished the tags off with either ribbon or a gem in co-ordinating colours then passed it round at work for signatures so Francesco was really pleased with it - and now also understands a bit more about what I do with my spare time!

9 November 2011

Space!

As promised yesterday - the Soup Dragon & a Clanger.

Sorry to Val who left a comment yesterday on how good they were but they were before my time!

This was a request from someone at work whose wife is a fan. The creatures are from a 3D sheet.
The backing paper which is rather fun is from a Forever Friends A4 pack and the 'moon' is just some black card with a light dusting of white ink.

I then managed to rustle up a couple of funky foam stars so I could add the greeting without covering up the lovely smiley stars.
A good one for people to smile at! The cards are coming thick & fast this week, more tomorrow.

8 November 2011

Christmas Owl

I have been meaning to try some different owls with this fab punch from Stampin' Up for a while, this is the first one, thanks to Splitcoaststampers for their ideas.

The body is punched over one of the stamps from the new 'Tags til Christmas' set which I think is rather fun and effective. I've also added a mini punched santa hat with fluffy bobble.
This is just sat on a Stampendous stamped tree which I stamped in brilliance pearlescent chocolate. I originally planned to add some sort of snow or snowflakes but todays thinking is just to leave him as he is.

Stamped sentiment punched out with SU modern label punch.
Tomorrow's card will feature a Soup Dragon and Clanger!

5 November 2011

Christmas Scene

Finally, a Christmas card!

Unfortunately scanning this in doesn't really do it justice, even though it is another 'simple but effective' number.

The stamp is a Hero Arts one called 'Winter Scene'. I have just stamped it with Staz-On on to white card, layered that on to a piece of black and mounted on a card - with a side fold which is quite nice for a change.

The sentiment is also Hero Arts.
The trees are then made twinkly with a glue pen and some fine glitter - this is what doesn't really show well on the picture but is subtle enough to make it a quick but smart card.

I am now off to find a home for my owl which may feature tomorrow!

30 October 2011

Mass production

A couple of days of Mr Blogger giving me the run around there - entirely his fault for not posting for over a week I'm sure!

While on hols recently I did pack a few crafty items to play with (always go away optimistically with thoughts of doing many a thing, never quite pans out).

Turns out hiking up some of the highest points in the country isn't conducive to staying awake in the evening but I did manage a couple of evenings of seeing how many sticky pads I could get through and have had another go this week whilst building up to tidying my mess so I can actually make a Christmas card before the big day.

These are all die-cut images - I used to tell people off for cheating but these have been quite popular sellers in between the more time consuming cards - from a selection of Tatty Teddy, Forever Friends & Fizzy Moon. Couldn't believe I have 40 pyramage & 3D images ready to turn in to cards, seems a little optimistic now!

22 October 2011

Tip of the day!

Quite literally a 'tip' of the day. Tried to load this post before I went away but our internet was having a bad time!

My tip is -if you have a very sharp craft knife and a steel edged ruler, remember to move your finger from the edge of the ruler when cutting paper - I did indeed cut a nice straight line across the top of my finger, not entirely recommended.

Anyway, healing nicely now and in the meantime I have been to the velodrome to watch Graeme in a spot of cycling and then walked a few miles in the Lake District - a quick holiday snap of me at the top of Scafell Pike here (England's highest point in case anyone not sure!).

Lots more crafty inspiration today too after visiting The Paper Warehouse for their Christmas Craft Demo day which was excellent, particularly getting some tips from Jenny Mayes of Hobby Art.

6 October 2011

A shared idea

Didn't realise until 2 days with no internet how much we relied on it!

Anyway, at the recent Shared Ideas day at the Quilling AGM Diane Boden Crane demonstrated some lovely cards that this one is based on.

As Mum came with me for the weekend and it is her birthday today I thought I would try it.
The circles are full strips wound round a random passing bottle! They are edged with some of Diane's famous spirals (1mm strips wound round very fine wire).
The bee, flower & butterfly are made using 2mm paper and seem to stay in rather better than expected given how fragile they look in their exposed circles.

The 3 circles are joined together with a peg and 2 marquise shapes between each and the same at the top & bottom of the piece. An aperture was then cut in the card that was big enough for the design with a bit of overhang for sticking!

Due to the nature of the card I then also stuck a little piece of fancy card on the back of the card with birthday greetings.
It isn't often I get to spend as long making special cards as I would like and know Mum will appreciate it. We're off to the theatre too though so no more crafting today!

2 October 2011

Make & Take

Well, several busy days and a trip to Manchester Velodrome later and not much crafting to blog!

Apologies to Janet in advance that October will be a quiet blog month for me - I still live in hope that some Christmas cards might turn up in time though.

Today I did have a quick go at Stevie's Stampin' Up catalogue launch make & take held at Stamp N Craft.

As with all these things I probably wouldn't of thought of using both these colours - must be more adventurous. The stamp set is 'Simply Soft' and is one of the new hostess options.

It is a 2-part stamp so the stems were stamped in 'certainly celery' and the overlay with the help of the lovely stamp-a-ma-jig was stamped in 'baja breeze' (I think).
I stamped the stems a bit high on the card really so it doesn't show the greeting to best effect - probably chatting too much!

The edges were then pricked with the help of the paper piercing template to finish off.

23 September 2011

Loving and Hugging

These cuties are a Penny Black slapstick stamp I came by recently!
I needed an Anniversary card quite quickly and just had to use them.

They are stamped, then coloured & shaded using copics. The picture and mat are cut out using the new X-Cut nesting dies (ornate frame) which I thought would be a useful shape and a bit different.

The greeting is mounted on a couple of trusty SU punches and the card is finished off with a few gems.

I got my new buys in Crafty Devils at Barnstaple if you are ever in the area it is a lovely well stocked shop!

21 September 2011

Sharing Quilling


On Sunday after the AGM we had a 'shared ideas' day for the third year. People are asked to take an idea to show or demonstrate and with about 20 of us there were many.

It was a fabulous day with company including Diane Boden (of quilled chocs fame), Jane Jenkins and Elizabeth Moad - all authors of books I love and we spent all day chatting and even managed a bit of quilling!

Todays pictures are the rose bowl winning card from Philippa from Quilliance Quills. This is awarded for innovative quilling and is a really effective card using 'twisted wheatears'. It was also good to put a face to the name as I have seen Quilliance posts on blogs.

The butterfly card was made by Janetta from Holland who always has lovely ideas. It is made on a quilling comb (or onion holder!) and is also really effective.
So many more ideas - so little time!

20 September 2011

Quilling Guild AGM


So much inspiration at the weekend. These pics are from the competitions at the Quilling Guild AGM.

Licia from Australia sent over the piece containing the lovely shoes and bag. The base is made up of many squares, each of which contains several a rolled paper strips.

The picture in a frame is always a really popular category and the doggy was this years winner - not only has he got a cute face but he was put together really well by one of our Japanese members.

The other piece was in a category where you can introduce 'non-quilled' components to enhance your piece. The lovely seagull on the rocks was quilled by Philippa and included mini real shells - a lovely piece.
More tomorrow.

19 September 2011

Been Quilling!

Well, so much for posting many a card for my recent demo days!

A very nasty lurgy saw an end to many samples being finally stuck together and the demos themselves which made me a bit grumpy.
Thankfully after thinking I would never feel well again I just about got on the straight and narrow to attend this years Quilling Guild AGM, display of work & shared ideas day - and what a fab weekend it was - when I've assessed the vast amount of pictures I took I will share some wonderful work and then get cracking myself too!

Jill

21 August 2011

Delightful Decorations


I made a project - hoorah!
I had the instructions for this Delightful Decorations project from Jenny nearly a year ago, then had to wait for the Stamps and punch to come back in to stock again.

I made this as a present for a friend who has a birthday today - I know it isn't quite the festive season yet but it will be no good giving this at Xmas!


The box is made from a single piece of 12x12. The added dividers give lovely spaces for matching gift tags which use the 4 different stamps from the SU set, with a bit of sparkle added too.

There are 6 cards, 3 of each colour - red, white & green. This picture shows you the 3 different designs as per the instructions which I followed for this box, the remaining 3 being the same but in a different colourway.
Unfortunately I do not have all the matching inks and papers from SU but the stash didn't do too badly and hopefully I can now try some more sets in different colours.


17 August 2011

Baby Blossoms

Another SU Extravaganza today!
Stealing ideas from the excellent Jenny I have made this lovely lilac/purple card.

It uses the two-step stamping set Baby Blossoms from the mini catalogue.
These are stamped on white on the top of the card, the bottom being some stripey paper from my stash. These pieces are both mounted on a piece of lilac card which has been SU border punched.

The label in the middle is also from the set, topped with a couple of SU punches (I seem to have several - no idea where they came from!).
The top image also has pierced holes in the scallops as a nice finishing touch and a couple of gems.
Didn't think about stamping a greeting on before I assembled the card and was too scared by the time it was all stuck down as I really don't want to mess it up - so an insert it is.

11 August 2011

Bazoo

The 'homework' card for Crafty Bunch this month was a 3D card. I chose a twisted pyramage design from my new Bazoo glittered designer pyramage pad - what a mouthful!

Isn't it sweet though?
I mounted the image on some nice bright card I had as a contrast to the backing paper (matching glittery pad obviously) which I stuck a square of to a Craftwork Cards scallop edged square card.

I used the SU modern label punch in yellow and cut a stamped greeting out with the SU window punch and finished with a couple of gems.

One day I will test the matching stamp sets too (ahem!!).

9 August 2011

Birthday Cards

Small spot of bother with my pictures and Mr Blogger for a few days - bless him!

Anyway, I had forgotten to add this picture of my 'crafty' birthday cards from a couple of weeks ago.

The Crafty Bunch I attend have a birthday club which means each birthday you get a nice pile of special cards. Unfortunately we have lost quite a few members over time but this picture includes this years (plus a couple from crafty chums at work that Anna roped in to make me a card!).

4 August 2011

Lego

Realised my posting has been a little lax again, I have been playing with bits and pieces but nothing of great note - although I did receive an order of some new copics to add to my collection yesterday that I must test!

This card was for my nephews birthday. As you can tell with no explanation his name is Harry and he was 5 - he loves lego. I got a really cheap Lego sticker book recently with all these characters in.

The 'service' ones are like the Lego people he plays with, I chose the basketball player as he went to the O2 recently to see basketball. The stickers are just mounted on corresponding card and cut round leaving a small border.
His name is cut from my little x-cut machine and mounted on coloured punched circles and '5' stamped on the background of the 8x8 card.
Happy Birthday peel-offs are mounted on the trusty SU oval punches.

20 July 2011

Bike Cards

Thanks to Jenny for a fab Stampin' Up Extravaganza on Saturday - so much inspiration and so little time.

I've had to hold off playing for a few days with SU ideas as had a few commissions to sort.

It's that time of year again when I make a few cards for the cycle races we are involved with.
This year I have made Thank You cards for various people concerned and some Congratulations for the children who have won prizes.

The Thank You card uses a Forever Friend bear on his unicycle from one of the new set of 'Good Life' stamps. Coloured in copics and cut out and mounted using oval and scallop oval punches.
The congratulations card uses a sizzix bike die, layered on red, white and blue - these are the club colours hence the theme.

For the greetings I have used computer generated sentiments cut out with SU word window punch, mounted on modern label punch.
I've made 15 of each of these with a typed message insert in the middle so that kept me quiet for a few minutes!

14 July 2011

Punch Extravaganza!

Just a quick post for this little chap today.

Apologies I can't remember the names of the products used but I know my Stampin' Up friends probably have them all anyway!

This lovely owl is from the new SU punch, sat on leaves from the SU bird punch - with some google eyes for effect!

He was layered on to two woodware punch circles.

The SU corner punch used in matching colours and while I was going have used another 2 SU punches (where did they all come from?!) to add a peel off too.

I am quite pleased with this SU punch extravaganza and think I might make some more.

10 July 2011

BBQ Alf

This is BBQ Alf from Craftsuprint.com who was ideal for a recent family birthday.

I printed him out and coloured the BBQ and grass with copics. The BBQ I then also glazed with gloss for a shiny metal look!

I printed out a second image, also coloured with copics and cut this out and mounted it on top of the first image to give a 3d look.

This is mounted on some of my stash of shiny green card, gloss black and a lovely pearl 8x8 card from Anna Marie designs.

Peel off greeting and a couple of card candy to finish off.

8 July 2011

Animals

This card is for a slightly crazy friend who I know will appreciate it!

The stamps are from the Penny Black 'Zoophabet' set. Some of the animal links to letters are a bit random - this features Ape and Neck.

The stamps were heat embossed and coloured with copics. The letters were then covered with glossy accents as a finishing touch.
The letters were punched out with an oval punch and layered on a matching colour of larger oval.

Stampin' Up

Finally I have an image.

Had a last minute call up to a Stampin Up evening the other day with Stevie.

This was the little make and take we did.
The background square had 4 squares of SU paper stuck to it then put through the bigshot using the SU square lattice embossing folder.
If I had thought it through I would of put my card in the folder the other way up but when passing stuff round the table you tend not to think too much about these things until afterwards!

I then used one of the new label punches, coloured it delicately using a water brush and ink from an ink pad then punched out with the matching punch.
I shall endeavour to add another picture tomorrow, apologies for a loss of posting again - so many things to do and sooo little time!!

5 July 2011

Wot no posts!

Not only has it been a fair while since I blogged but the last few days I haven't been able to add a picture - I will rectify this today or tomorrow by confusing my computer into submission!!

Back soon!
Jill

9 June 2011

Workshop

Sorry - have been meaning to post this all week.
I was very pleased with the first of my two workshops last month and was impressed with how much the ladies did during our time, especially as most were complete beginners.

For 'round 2' I had 5 of the same ladies so thought I knew what we could get through - turns out it took longer than expected!

Anyway, this sampler of flowers was the project we did, designed to use different shapes and techniques in different flowers.

The top row: simple teardrop flower, marquise flower (with mini christmas variation to show how different colours give a different effect), concentric coils shaped in to a teardrop.
Middle row: dart petals, teardrops edged with a contrasting strip (not as clear in photo), solid coils (again with xmas rose variation).
Bottom row: fringed flowers (small, large & with centre), buds, folded roses.

I saved the roses until the end as I didn't want to put people off but we were already way over our time and they were a little scared with them - practice makes perfect though!

Anyway, they've threatened to come back for Christmas quilling so can't of been too bad.

1 June 2011

Italian Iris Folding!

Hooray - another card escaped!

This time for an Italian colleague who was returning home after quite a few months over here - I wish my Italian was as good as his English.

This card wasn't what I set out to do (they never seem to be do they) but I got the chart for this off craftsuprint.com.

The silver/grey card is lovely double sided pearl with an aperture cut at a 'jaunty' angle for the iris folded flag which was really quick to do (don't tell anyone).

The letters are cut with my trusty x-cut impress in paper of the same shade and layered on matching flag colours. Some trusty card candy (matching) in the corners and a red layer underneaath to finish before adding to a silver pearl 8x8 card.

21 May 2011

Tatty Teddy

Managed to fit an Anniversary card in between all the Winnie the Pooh quilling recently.

This is a new Tatty Teddy stamp that happened to come in to my possession. Much nicer to stamp than to cross stitch (never again!).

I coloured him in copics, punched out and mounted on a shape punched out of some lovely silver sparkly card from Anna Marie Designs.

The card itself is also pearly and from Anna Marie. The corners of the card are decorated using an SU punch in both colours of pearl card, with a card candi on (now with spots, how fab).

Finished with a greeting and several little punched hearts.

15 May 2011

Winnie the Pooh

And for this weeks commission!
A lady that visited a demo I did last year took my details and recently asked if I could quill a Winnie the Pooh for her friends birthday.

This is done by choosing an outline picture and putting it on a cork board covered with some cling film. It is then a case of quilling shapes and literally 'colouring' in with them and glueing them together as I go. For this I also used some thick black paper strips for outlining to give him a good definition.

I estimated it would take about 6 hours, it took nearer 10 and used just over 400 quilled pieces in yellow and red!

To finish I mounted Pooh on some matching colours of card and added a greeting as requested - Pooh also came with a little butterfly.

Now to try and refine some things to quill for next weeks workshop, I don't think cards that take 10 hours will go down well!

12 May 2011

Meerkats!

Today's offering was another quick card for a Meerkat fan and I bought a sheet of Hunkydory die cut pictures that made me smile recently.

The image is mounted on some sparkly card, then gold and red to match the image. More fab card candy in the corners, then an SU punch used for the 'frame' corners on the card to match in with the colours.

Quite an effective quick card and now back to my commission!

9 May 2011

Warren

Hooray - I made a card!
This is Warren, a very cute looking chap I liberated from Craftwork Cards.

I stamped him using a Momento ink called London Fog, then coloured in using Copics. I used some glossy accents on the flowers and butterflies too.

I punched out the image and mounted on to a Nellie's die using some very nice green sparkly card I luckily bought lots of whilst we still had the Paper Mill.

This was mounted on a strip of matching card, white card then a piece of patterned paper from the stash to tie together. 4 card candy pieces in the corner which were coloured in the same copic green as the leaves and finished with a couple of SU punches and peel off greeting.

Still a little slow on blogging as got a commission on this week but will post that when complete too.